


Dreaming of launching your own fitness app to manage clients, achieve fitness goals, or start a profitable side project? Many abandon this dream, thinking they need extensive technical and coding skills.
Let's debunk that myth.
We’re here to tell you that you can create your very own fitness app with absolutely zero technical and coding experience. In this article, we’ll show you how to build a fitness app.
What You Need To Get Started
Before you start building your app, you’ll need an action plan. Just like a woodworker starting a new project, you’ll need to have all your tools, materials, and a blueprint ready before you can start constructing your app.
Ensure you have the following before you start:
- Drawings of your app. You don’t need to be a Picasso with a pencil, but you should be able to roughly sketch out how each screen will appear and what illustrations and graphics it will feature.
- A list of your app’s features. Do you want to have a chat box that pops up when users tap an icon? Will you accept payments right from your app? How about an exercise library? These are just some features you can add to enhance your app’s user experience.
- An Adalo membership. Adalo is one of the most powerful no-code mobile app builders available. You don’t need any technical or coding skills to create an app with Adalo.
Adalo features a simple drag-and-drop interface that lets you build your app by seamlessly dragging elements onto a building canvas and editing for style as you go. When you build with Adalo, you can create a super professional-looking fitness app.
Understanding How a Fitness App Works
Let’s talk about anatomy — more specifically, the anatomy of all apps, including your fitness app.
Apps are made up of the following parts:
- The Front End: This is the part of your fitness app that users see and interact with — it’s also called the “user interface.” All the visual parts of your fitness app, like the screen color, text, and background, make up its front end.
- The Backend: Your fitness app’s backend is where all the magic happens. It’s where the app “thinks” by executing logic, loading new screens, and connecting with other apps that you’re integrated with.
- The Database: While databases are technically part of the backend, they deserve their own mention. All your fitness app’s user data will be stored here. Here is what I mean by user data:
- Client data: Names, ages, heights, weights, the date they became your client.
- Fitness data: VO2 max, heart rate, body fat percentage, etc.
- Usage data: A record of when your clients log on and off, or actions they take in your app.
- Payment data: The amounts, dates, and times your clients pay you through your app.
- Any other data: Chat history, special offers, and more.
Adalo has its own built-in database, so you won’t need to worry about connecting an external one. You can build your database as you build your fitness app. Conveniently, Adalo’s database records client data in real time.
For instance, if you’re monitoring your client’s heart rate during an intense cardio session, you can integrate your MapMyFitness account with your Adalo-made app. Adalo’s real-time data syncing can then record every heartbeat.
How To Build a Fitness App: 7 Steps for Building a Fitness App without Code
Now that you’ve got a little bit of a background about what you’ll need to build your app, it’s time for the fun stuff: Building your app with Adalo!
While our guide will provide enough info to show you how to build a fitness app, you might have a few questions. Luckily, Adalo has an enormous ecosystem filled with expert guides, tutorials, and more that will help you overcome any issue that arises. Here are a few resources:
- The Adalo Forum: Got a question? Post it on the forum, and get an answer back from an experienced Adalo user.
- The Adalo Academy: Adalo’s Academy offers courses, guides, and tutorials to develop and sharpen app-building skills.
- Adalo’s YouTube Page has over 150 videos. They’ll teach you how to add components, integrate with other apps, and more.
Let’s jump in!
Step 1: How to Find a Fitness Template
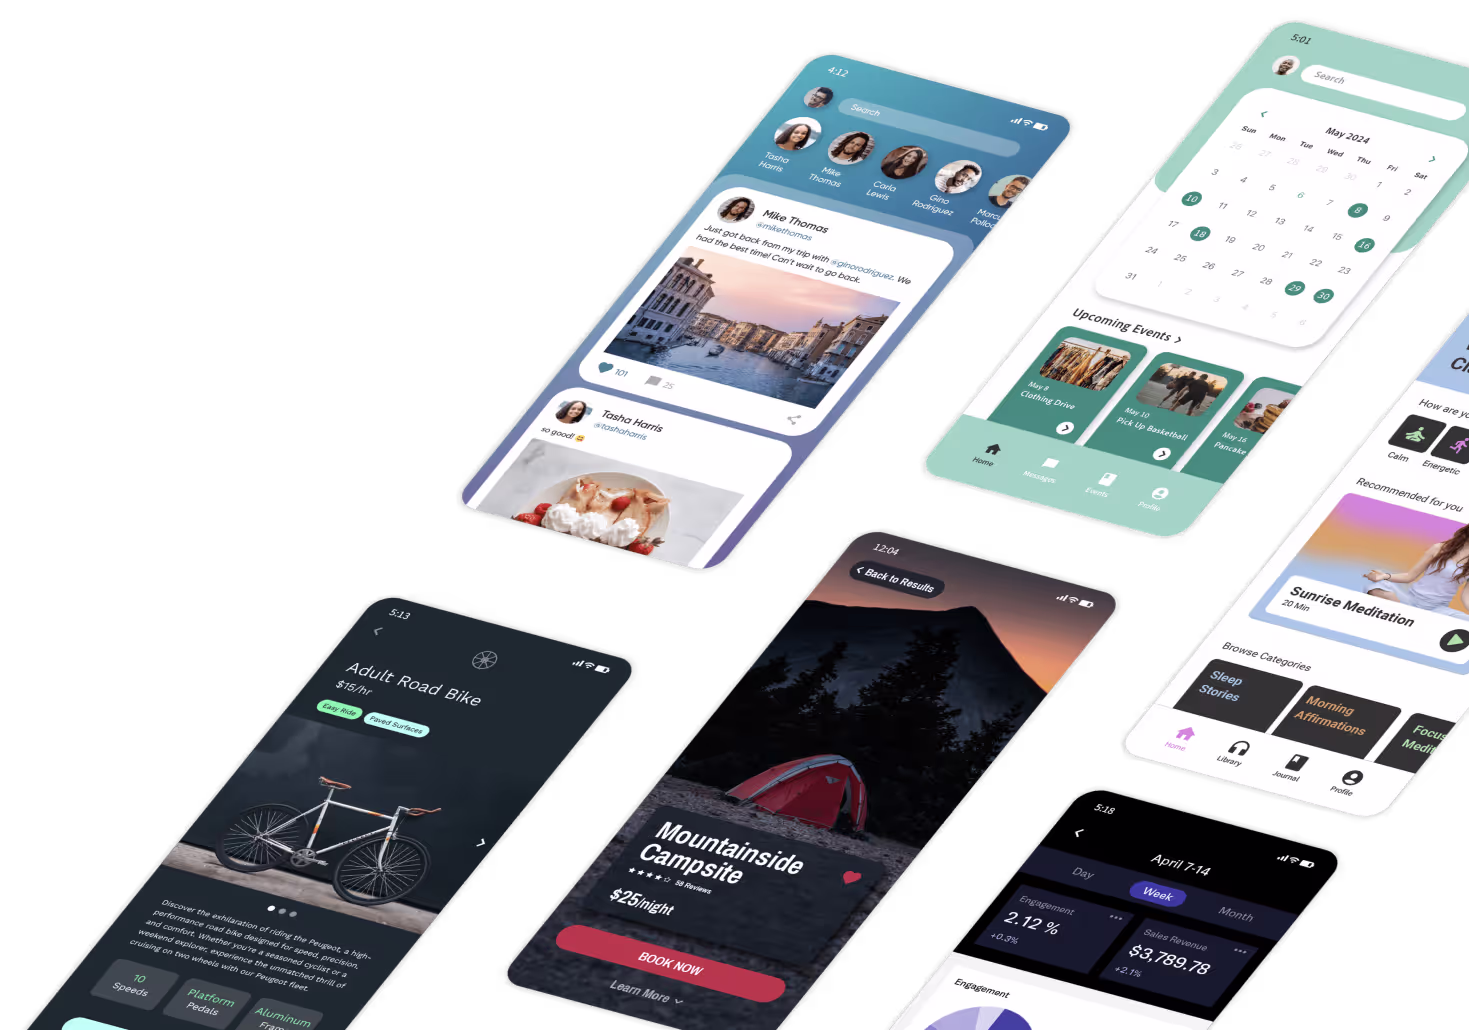
Adalo has a template selection to satisfy almost any taste, so you shouldn’t have issues finding a fitness template. On the templates page, you’ll find three templates that are specifically catered to those building a fitness app.
Each template differs in the number of screens and overall functionality. The template you choose ultimately depends on how much power you want — the more screens you have, the more functions your app will execute.
Here’s a rundown of the three fitness app templates:
- Workouts Request: This is more geared towards larger gyms with trainers offering group and individual sessions. Users can create their own profiles, track their workouts, book classes, chat, and more.
- Booking and Scheduling: A template for booking classes, creating profiles, and chatting.
- Workout Library: A template that lets users choose workouts, create profiles, and follow and record workouts.
Step 2: How to Customize Your Template’s Look, Feel, and Branding
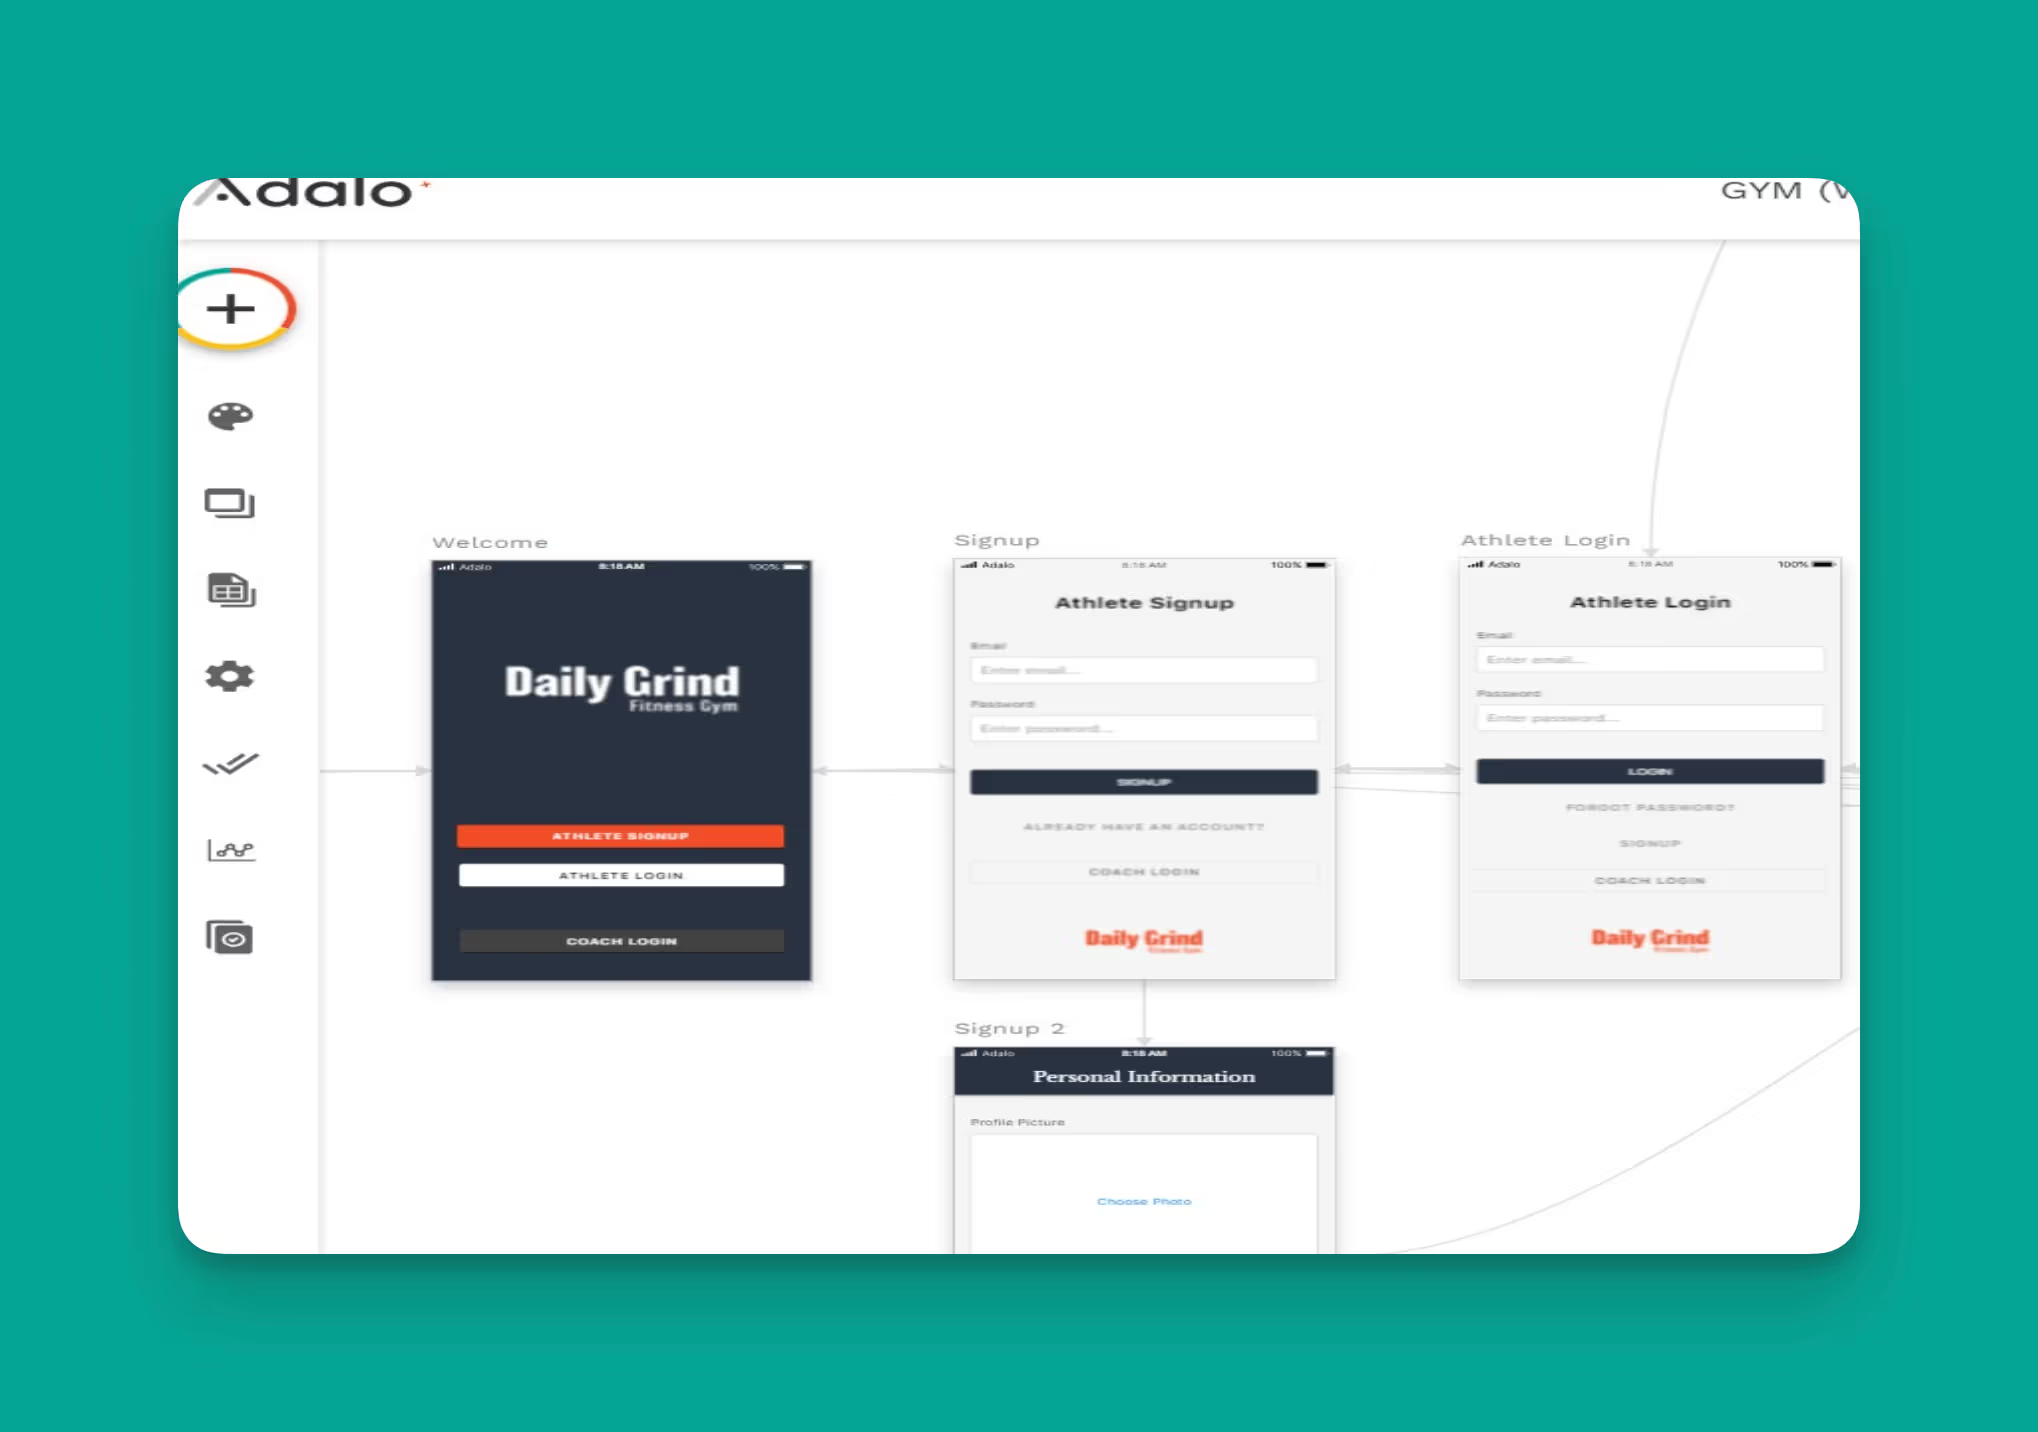
Now that you’ve got your template, it’s time to give it your own flair using Adalo’s simple building interface. You'll see a drop-down dashboard on the left side of your screen. Use this to configure your fitness app’s appearance and features.
In the center of the screen, you’ll see your building canvas containing all your app’s screens. Arrows connect each screen to the other screens that it can open.
Hover your mouse above each icon on the drop-down dashboard to your left to see what specific role each one plays. From the top of the screen, here are the drop-down dashboard’s buttons and the tasks they execute:
- Add Component/Add Screen (“+”): Use this to create new screens, add buttons, text boxes, pictures, and more.
- Branding Button (looks like an artist’s palette): This button allows you to switch up your app’s color scheme and font.
- Screens: When you push this button, you’ll see all the titles of all your screens that appear on your building canvas, but in the form of a list. Navigate to each screen quickly using this function.
- Database Collection: This is exactly what it sounds like — it’s where Adalo records and saves all your user information. We’ll talk more about this in Step 3.
- Settings: Here’s where you can rename your app, write a short description for the Apple App Store and Google Play Store, add API keys, and give access to collaborators if people are helping you build your app.
- Publish: Essentially, this is your “launch button.” You’ll press this after you’ve put the finishing touches on your app and are ready to publish it to the Apple App Store, Google Play Store, and the web. We’ll delve into publishing in Step 6.
- Analytics: Press this to see your daily number of users, their locations, your most popular screens, and more.
- Version History: Want to make a few different versions of your app? You can make up to 10. Create and access these here.
Step 3: How to Customize Your Template’s Data
While Adalo lets you connect an external database, we assume you don’t have one. We’ll walk you through building your app using Adalo’s own database.
We know that the word “database” conjures bland images of endless spreadsheets. But we’re here to assure you not to be intimidated!
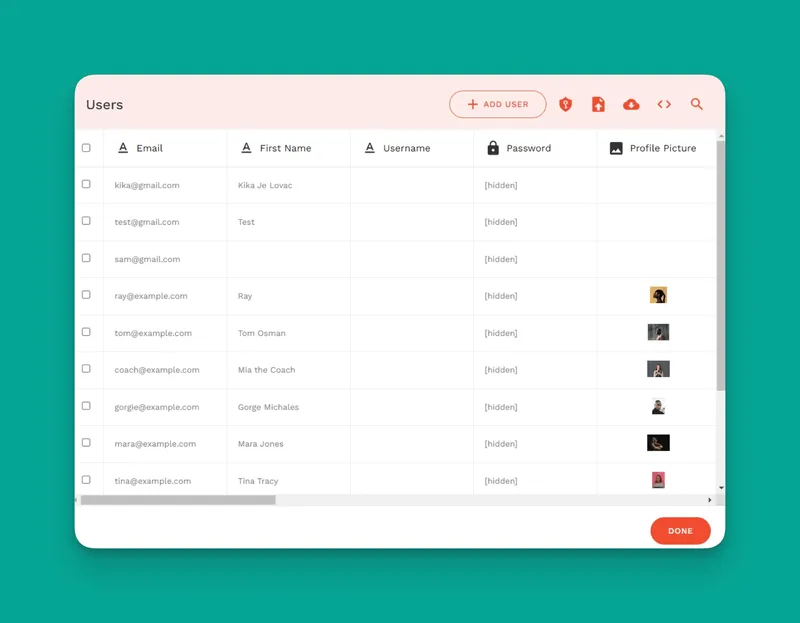
Conveniently, Adalo already has your database set up in your template. Navigating, editing, and customizing each piece of data is a breeze. Just click on the “database icon,” the one that looks like a spreadsheet, and you’ll see a well-organized list of your app’s data.
Your database collection is a list of all the info that’s saved to your app. You’ll start with up to 9 collections (depending on your chosen template). Collections include users, exercise types, messages, and more.
You can view each collection's properties by clicking on it. You can edit these database properties as you build to customize your database.
Step 4: How to Add New Pages
Do you have a page idea that is not included in the template? Adalo has you covered. To add a new page, click the large “+” icon at the top of your left screen.
You’ll also be able to use this button to add different screen types, such as lists and forms.
Adalo provides very thorough templates for building your fitness app. You most likely won’t need to add any new screens.
Step 5: How to Preview Your App
Want to see how your app would look if you published it right now? At the top of your screen and to your far right, you’ll find a green button titled “View App.” Clicking on that button unveils a drop-down menu with two options: previewing and sharing your app.
Click on the staging preview. After loading, your app will appear at the center of your screen. At the top right of your screen, you can select the device type for viewing your app. For instance, you can see how your app will appear on an iPhone 13 mini, a Samsung Galaxy S20, or an iPhone SE.
The preview function lets you see how your app looks and feels. Just use your mouse to click through your app as you would a real app on your phone. Be sure to jot down where you think you need to make changes if need be.
You’ll also be allowed to share your app when you click the green “View App” button. Adalo lets you do this by downloading a QR code and sharing a link. We highly recommend you share this app with a handful of people and get feedback to iron out any wrinkles.
Step 6: How to Publish Your App in the App Stores
After you’ve shared your app with a few folks and made the necessary changes, it’s finally time to publish it to the Apple App Store and Google Play Store! This is where that handy “Publishing” button at the bottom of the left-hand drop-down menu comes into play.
The Apple App Store and Google Play Store have different publishing procedures. Here’s how they work:
Apple App Store
The first step to publishing your app to the Apple App Store is to open a developer account. Once that’s covered, you’ll want to create a Bundle ID for your app.
Fill out the required fields and metadata, submit a few screenshots, and pay the required $99 annual fee. After you pass the review period (which takes anywhere from a few days to a few weeks), you can manually submit your app to the Apple App Store.
When you’ve set everything up, you’ll want to have a few users give your app a test run. Apple accommodates this through its Testflight program. Testflight lets Apple App Store Users try out your app and give feedback, which you can use to make minor adjustments before releasing your app.
If you have any more questions about getting your app on the Apple App Store, you can find detailed answers here.
Google Play Store
First things first, you’ll need to create a developer account on the Google Play Console and follow the instructions for connecting your app to the Google Play Store.
Complete the required forms, submit a few screenshots of your app, and pay Google’s one-time $25 fee. Just like with Apple, you can have Android users test your app by going to the Internal Testing Page on your Google Play Console account. Use the feedback to make any needed adjustments.
Google’s review process is notably shorter than Apple's, taking as little as a few hours to a few days. After approval, you can immediately publish your app to the Google Play Store or schedule a publishing date.
Adalo provides a super-detailed walkthrough of publishing your app to the Google Play Store here.
How To Supercharge Your App’s Listing
Many people, billions actually, search for apps on the app stores. Optimize your app to get heaps of downloads by following these pointers:
- Keyword Research: Think about the different words people use to describe your app. While you might describe it as a fitness app, others might use the search term, “workout app.” Use both of these terms in your description. Doing this will get your fitness app in front of more eyeballs on the app stores.
Protip: Don’t just type out your description in one go. Read the descriptions of the top-ranking apps and use these as a model. Then, when writing yours, describe your app in a way that will draw in users and give them a precise idea of what your fitness app offers.
- Aesthetically Pleasing Screenshots: Ensure all the screenshots you use look professional and feature your app’s unique qualities, such as a heart rate monitor or online chat.
- Build an Attention-Grabbing Icon: Your app’s icon will appear to the left of your app’s title on the search results. It will compete with similar apps for taps, so you’ll need to pull out all the stops.
If you’re stressed about designing an icon because you’re not a graphic designer, relax. It’s 2024, and many easy icon makers are out there. For starters, try out Looka and Softorbits.
Want more ideas on getting the best out of the app stores? Read our guide to running App Store Ads.
Step 7: How to Take Payments
Adalo is conveniently integrated with Stripe, so you can take payments for your services right from your fitness app! Just follow these steps:
- Before you can accept payments, you’ll need to set up a Stripe account.
- Once you’ve got a Stripe account, click on the “add components” button at the very top of your left-hand side drop-down dashboard, and scroll down to “marketplace.”
- Click on the green “explore marketplace” button. Then, type “Stripe” into your search bar. The Stripe Kit icon will appear on your screen — all you need to do is install it.
- Return to the “add components” button and scroll down to the “installed” bar. Click on it to find your “Stripe Payment” element.
- Drag the “Stripe Payment” element to the payment screen on your building canvas.
- Once you add it to your screen, configure your Stripe account information in the bar on your left.
- You’re ready to get paid!
Next Steps: Getting Users, Tracking and Analytics, Maintenance
Congrats, you built your own fitness app without coding. Now, it’s time to grow and maintain your app.
First, you’ll want to invite users to your app. If you already have clientele, ensure they know they can download your app directly from the app stores. Don’t forget to remind your followers on Instagram, Facebook, and all other social media that you’ve built a gorgeous fitness app.
To really delve into marketing your fitness app, check out this guide.
Maintaining Your App and Analyzing Its Performance
To see how well your app performs, click the “Analytics” button at the bottom left-hand side of your app-building interface. You’ll want to keep up with your analytics weekly to see how quickly your app is becoming popular and to make necessary adjustments to attract more users.
Like a landscaper who mows lawns and trims trees, you’ll need to monitor and maintain your app to ensure it always provides a good user experience. Collect feedback from your users to determine if anything needs fixing. And run regular updates to keep your app running like a well-oiled machine.
Making your own professional-looking fitness app using Adalo is something any non-techie can achieve.
If you have any questions our guide didn’t cover, you can find answers on Adalo’s Getting Started page. Happy building!
.png)
.png)
.png)